import tensorflow as tf # pip install tensorflow Loading - " MNIST Data Set"
Containing Training samples = 60,000 , Testing Samples = 10,000
TensorFlow already contain MNIST data set which can be loaded using Keras
mnist = tf.keras.datasets.mnist## this is basically handwritten characters based on 28x28 sized images of 0 to 9After loading the MNIST data, Divide into train and Test datasets
## unpacking the dataset into train and test datasets
(x_train, y_train),(x_test, y_test) = mnist.load_data()
x_train.shape
(60000, 28, 28)

import matplotlib.pyplot as plt
plt.imshow(x_train[0])
plt.show() ## in order to execute the graph
## however we dont know whether its color image or binary images
## so inorder to plot it  change the configuration
plt.imshow(x_train[0], cmap = plt.cm.binary)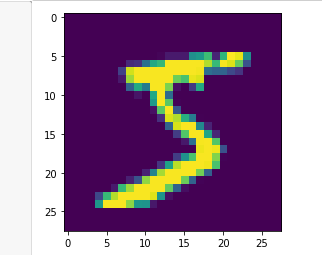
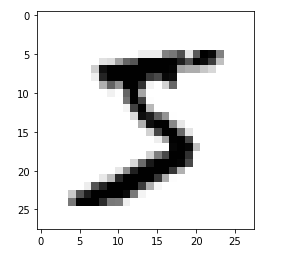
Checking the value of each pixel
Before Normalization
print (x_train[0]) ### before normalization 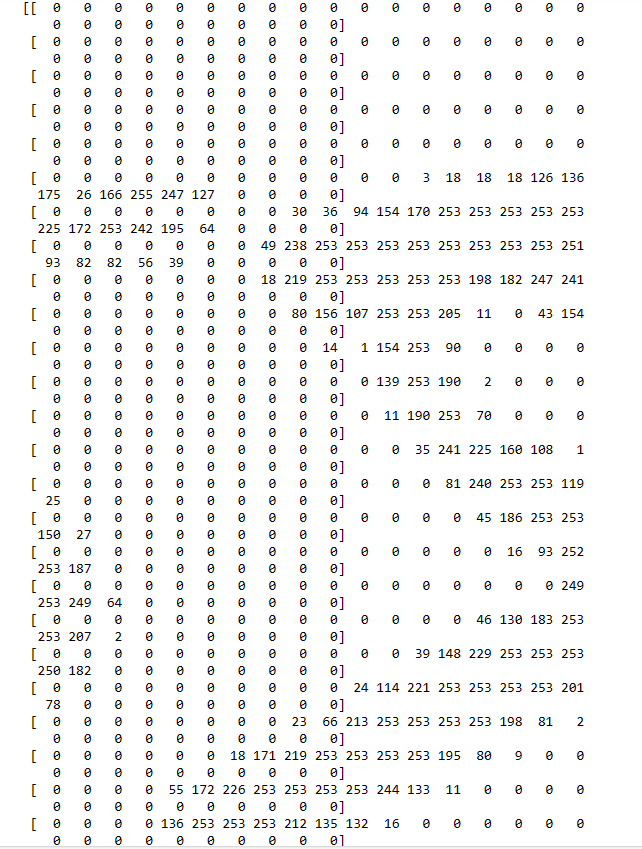

As images are in Gray level (1 channel ==> 0 to 255), not Colored (RGB)
Normalizing the data | Pre-Processing Step
### you might have noticed that , its gray image and all values varies from 0 to 255
### in order to nomalize it
x_train = tf.keras.utils.normalize (x_train, axis = 1)
x_test = tf.keras.utils.normalize(x_test, axis=1)
plt.imshow(x_train[0], cmap = plt.cm.binary)
After Normalization
print(x_train[0]) ## you can see all values are now normalized.
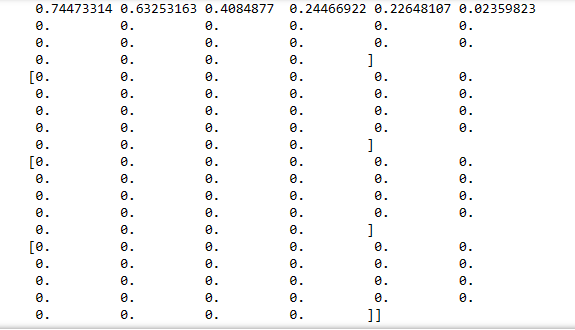
print (y_train[0])  ### just to check that we have labels inside our network
5
Resizing imag to make it suitable for apply Convolution operation
import numpy as np # pip install numpy
IMG_SIZE=28
x_trainr= np.array(x_train).reshape(-1, IMG_SIZE, IMG_SIZE,1)  ### increasing one dimension for kernel=filter operation
x_testr= np.array(x_test).reshape(-1, IMG_SIZE, IMG_SIZE,1)  ### increasing one dimension for kernel operation
print ("Training Samples dimension",x_trainr.shape)
print ("Testing Samples dimension",x_testr.shape)
Training Samples dimension (60000, 28, 28, 1)
Testing Samples dimension (10000, 28, 28, 1)
Creating a Deep Neural Network
Training on 60,000 samples of MNIST handwritten dataset
from tensorflow.keras.models import Sequential
from tensorflow.keras.layers import Dense, Dropout, Activation, Flatten, Conv2D, MaxPooling2D
#### Creating a neural network now
model = Sequential()
##### First Convolution Layer 0 1 2 3 (60000,28,28,1) 28-3+1 = 26x26
model.add(Conv2D(64, (3,3), input_shape = x_trainr.shape[1:])) ### only for first convolution layer to mention input layer size
model.add(Activation("relu"))## activation funtion to make it non-linear, <0, remove, >0
model.add(MaxPooling2D(pool_size=(2,2)))## MAxpooling single maximum value of 2x2,
##### 2nd Convolution Layer
model.add(Conv2D(64, (3,3))) ## 2nd Convolution Layer
model.add(Activation("relu")) ## activation funtion
model.add(MaxPooling2D(pool_size=(2,2)))## MAxpooling
##### 3rd Convolution Layer
model.add(Conv2D(64, (3,3))) #
model.add(Activation("relu"))
model.add(MaxPooling2D(pool_size=(2,2)))
#### Fully Connected Layer # 1 20x20= 400
model.add (Flatten()) ### before using fully connected layer,need to be flatten so that 2D to 1D
model.add (Dense(64)) #
model.add(Activation("relu"))
#### Fully Connected Layer # 2
model.add (Dense(32))
model.add(Activation("relu"))
#### Last Fully Connected Layer , output must be equal to number of classes, 10 (0-9)
model.add(Dense(10)) ## this last dense layer must be equal to 10
model.add(Activation('softmax')) ### activation function is changed to Softmax (Class probabilites )model.summary()
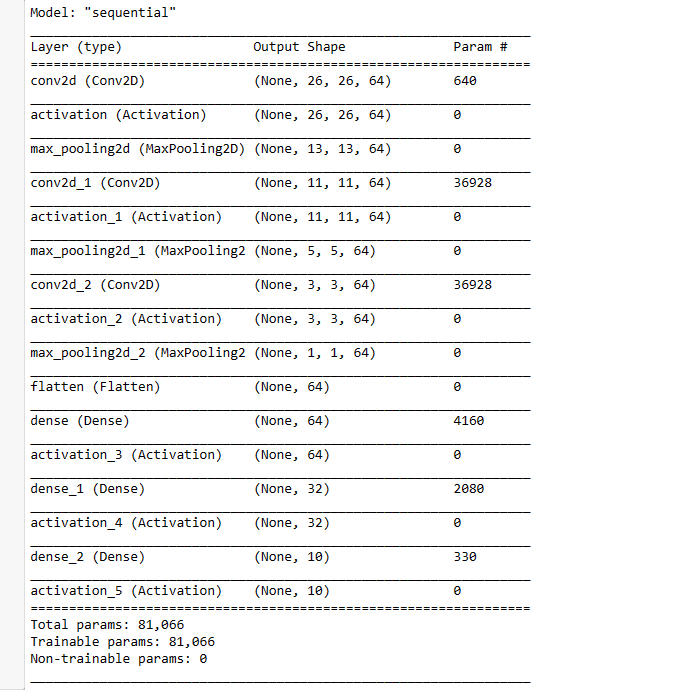
print ("Total Training Samples = ",len(x_trainr))
Total Training Samples =  60000
model.compile(loss ="sparse_categorical_crossentropy", optimizer ="adam", metrics=['accuracy'])
model.fit(x_trainr,y_train,epochs=5, validation_split = 0.3) ## Training my model
### Evaluateing on testing data set MNIT
test_loss, test_acc = model.evaluate(x_testr, y_test)
print ("Test Loss on 10,000 test samples",test_loss )
print ("Validation Accuracy on 10,000 test samples",test_acc )

# predictions = new_model.predict([x_test])  ## there is specialized method for efficeintly saving your model , to name all inputs, outputs and weights before saving and then weights should be save etc
   ### therefore instead of usign new model loaded , for now only for predcitions I am using simple model
predicions = model.predictprint (predicions)  ## actually these predictions are based on one hot encodeing so these are only arrays, containing softmax probilites([x_testr])

## in order to understand, convert the predictions from one hot encoding , we need to use numpy for that
print (np.argmax(predicions[0])) ### so actually argmax will return the maximum value index and find the value of it
#   7
### now to check that is our answer is true or not
plt.imshow(x_test[0]) 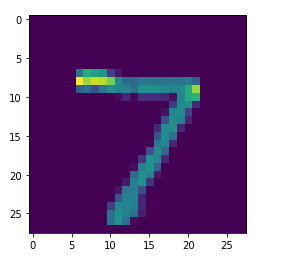
## in order to understand, convert the predictions from one hot encoding , we need to use numpy for that
print (np.argmax(predicions[128])) ### so actually argmax will return the maximum value index and find the value of it
#  3
### now to check that is our answer is true or not
plt.imshow(x_test[128]) 
import cv2 ## pip install opencv-python
img = cv2.imread('eight.png')
plt.imshow(img)
img.shape
(903, 430, 3)
gray = cv2.cvtColor(img, cv2.COLOR_BGR2GRAY)
gray.shape
(903, 430)
resized = cv2.resize(gray, (28,28),interpolation = cv2.INTER_AREA)
resized.shape
(28, 28)
newimg = tf.keras.utils.normalize (resized, axis = 1)  ## 0 to 1 scaling
newimg= np.array(newimg).reshape(-1, IMG_SIZE, IMG_SIZE,1)  # kernel operation of convoution layer,
newimg.shape
(1, 28, 28, 1)
predicions = model.predict(newimg)
print (np.argmax(predicions))
#  8
Video Demo
#import cv2 ###  pip install opencv-python
 ## pip install opencv-contrib-python   fullpackage

import numpy as np  ## pip install numpy
font_scale = 1.5
font = cv2.FONT_HERSHEY_PLAIN


cap = cv2.VideoCapture("Record_2020_10_24_01_10_00_517.mp4")
#cap.set(cv2.CAP_PROP_FPS, 170)
# Check if the webcam is opened correctly
if not cap.isOpened():
    cap = cv2.VideoCapture(0)
if not cap.isOpened():
    raise IOError("Cannot open video")


text = "Some text in a box!"
# get the width and height of the text box
(text_width, text_height) = cv2.getTextSize(text, font, fontScale=font_scale, thickness=1)[0]
# set the text start position
text_offset_x = 10
text_offset_y = img.shape[0] - 25
# make the coords of the box with a small padding of two pixels
box_coords = ((text_offset_x, text_offset_y), (text_offset_x + text_width + 2, text_offset_y - text_height - 2))
#cv2.rectangle(img, box_coords[0], box_coords[1], rectangle_bgr, cv2.FILLED)
#cv2.putText(img, text, (text_offset_x, text_offset_y), font, fontScale=font_scale, color=(0, 0, 0), thickness=1)
cntr =0;
while True:
    ret,frame = cap.read()
    cntr= cntr+1;
    if ((cntr%2)==0):

        gray = cv2.cvtColor(frame, cv2.COLOR_BGR2GRAY)
        resized = cv2.resize(gray, (28,28),interpolation = cv2.INTER_AREA)
        newimg = tf.keras.utils.normalize (resized, axis = 1)
        newimg= np.array(newimg).reshape(-1, IMG_SIZE, IMG_SIZE,1)
        predicions = model.predict(newimg)
        status=np.argmax(predicions)


        print(status)
        print(type(status))

        x1,y1,w1,h1 = 0,0,175,75
        # Draw black background rectangle
        cv2.rectangle(frame, (x1, x1), (x1 + w1, y1 + h1), (0,255,0), -1)
        # Add text
        cv2.putText(frame, status.astype(str), (x1 + int(w1/5),y1 + int(h1/2)), cv2.FONT_HERSHEY_SIMPLEX, 0.7, (0,0,255), 2)


        #gray = cv2.cvtColor(frame, cv2.COLOR_BGR2GRAY)
        #print(faceCascade.empty())
        #faces = faceCascade.detectMultiScale(gray,1.1,4)

        # Draw a rectangle around the faces
        #for(x, y, w, h) in faces:
          #  cv2.rectangle(frame, (x, y), (x+w, y+h), (0, 255, 0), 2)


        # Use putText() method for
        # inserting text on video

        cv2.imshow('handwritten Digits Recognition Tutorial',frame)

        if cv2.waitKey(2) & 0xFF == ord('q'):
            break

cap.release()
cv2.destroyAllWindows()